# yum install tigervnc-server -y        #安装VNC服务器
# vncserver                             #启动服务器
You will require a password to access your desktops.

Password:                    #这里设置的密码是可以操控服务器的,连接时输入这个密码
Verify:
Passwords don't match - try again
Password:
Verify:
Would you like to enter a view-only password (y/n)? y  #设置一个只可以查看,但是无法操作,相当于录制屏幕而已,如果不需要可以选n
Password:
Verify:

New 'localhost.localdomain:1 (root)' desktop is localhost.localdomain:1

Creating default startup script /root/.vnc/xstartup
Creating default config /root/.vnc/config
Starting applications specified in /root/.vnc/xstartup
Log file is /root/.vnc/localhost.localdomain:1.log
# vncserver :1 #开启远程端口# 注意关闭防火墙和selinux使用客户端VNC连接
注意:因为我们开启的是vncserver :1,而vncserver默认是从端口5900开始的,所以,我们使用5900+1=5901端口
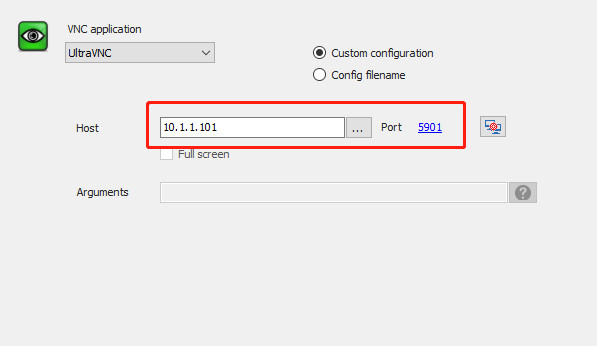
连接时直接输入密码即可
配置Tigervnc
安装VNC
yum -y install tigervnc-server tigervnc复制一份配置文件
cp /lib/systemd/system/vncserver@.service /lib/systemd/system/vncserver@:1.service修改配置文件:(主要是修改root用户)
vim /lib/systemd/system/vncserver@:1.service[Unit]
Description=Remote desktop service (VNC)
After=syslog.target network.target
[Service]
Type=forking
User=root
# Clean any existing files in /tmp/.X11-unix environment
ExecStartPre=/bin/sh -c '/usr/bin/vncserver -kill %i > /dev/null 2>&1 || :'
ExecStart=/sbin/runuser -l root -c "/usr/bin/vncserver %i -geometry 1280x720"
PIDFile=/root/.vnc/%H%i.pid
ExecStop=/bin/sh -c '/usr/bin/vncserver -kill %i > /dev/null 2>&1 || :'
[Install]
WantedBy=multi-user.target加载配置
systemctl daemon-reload设置开机启动
systemctl enable vncserver@:1.service